How to vectorize hand lettering without Photoshop, Illustrator, or a scanner
I've shown you a lot of ways to digitize hand lettering, but most of these involved Photoshop, Illustrator, or a combination of the two. But what if you don't have access to one of any of these programs or even a scanner? I'd hate for technology to hold you back from your lettering and illustration goals.
How to vectorize your artwork and hand lettering for free by using Inkscape: and without photoshop, illustrator or a scanner
Let's digitize and vectorize your hand lettering, as low-tech and inexpensively as possible. Pretty much for free.
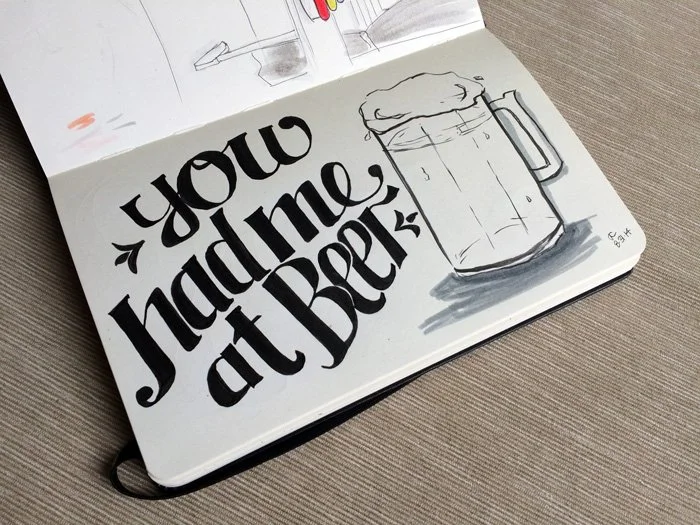
Let's try to vectorize this (anti-) Valentine's day lettering piece I did a while back: without a scanner, without Photoshop, and without Illustrator. All you need to follow along is a computer, a phone, your fully-inked hand lettering piece, and an internet connection to download a free program (Inkscape).
You had me at beer hand lettering inked drawing in a moleskine sketchbook
After going through this process, I have to say how pleasantly surprised I am at how this worked. Inkscape IS a free program so it's buggier than Illustrator, but it sure can get the job done, and this is only the tip of the Inkscape iceberg.
Step 1: Take a Photo of Your Finished Work
The iPhones, especially an iPhone 5 or newer, have amazing cameras. (Which now that I said iPhone 5 shows how dated this post is… the iPhone 14 was just announced this year [2022] 😆) Now the native photo editing software is also awesome.
So, take a photo of your finished work. Try to take it head-on, without shadows or glare.
Step 2: Edit Your Photo within the iPhone
Take your photo and edit it so it's high contrast, much like we would do in Photoshop in step 2 of this tutorial.
By adjusting the Exposure, Contrast, Black Point, and desaturating the image completely within the iPhone's photo editor, I've managed to do this:
Adjustments made within iPhone photo editor
Here are the settings I used. They'll be different for you and it takes some trial and error.
iPhone photo editor settings to increase contrast exposure brightness and desaturate
iPhone photo editor settings to increase contrast exposure brightness and desaturate
Also, remember to crop your photo so extraneous background stuff isn't visible. This will save you time later on. Here's the fully edited image:
fully adjusted and cropped image
Step 3: Transfer Your Photo and Download Inkscape
Now, transfer your edited photo to your computer.
How you choose to do this is up to you. If you have a Mac, you can Airdrop it, send it via Messages, etc. Or you can email it to yourself. Or you can hook up your phone to your computer the old-fashioned way. You get the point.
Download and install Inkscape.
I talked more about it in this Illustrator alternatives roundup. It's free, and it's available for both Mac and PC. You'll also need to download XQuartz if you have a Mac.
Step 4: Digitize in Inkscape
Once you have Inkscape up and running, go to File - Import to import your drawing. Resize it and place it in the artboard.
Tutorial: Use the free application Inkscape to trace and vectorize your illustration and hand lettering
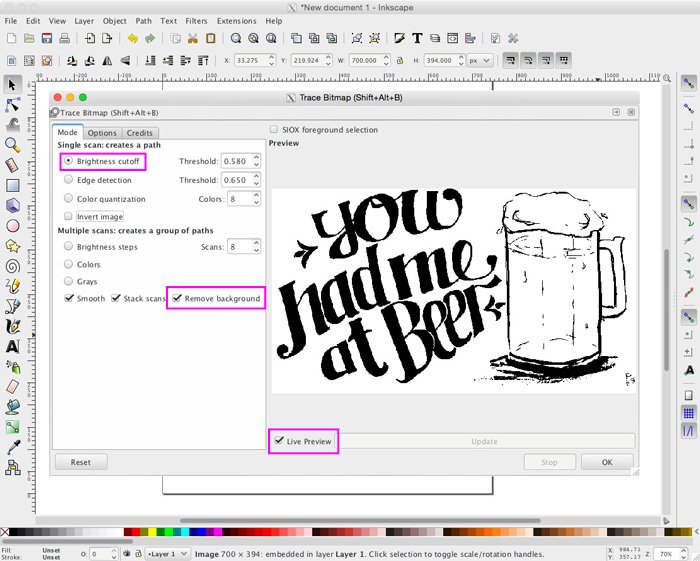
From there, select and right-click on your drawing. Select Trace Bitmap.... This will bring up a new dialog box. Resize the dialog box and select Live Preview so you can see your results better.
We want to work with the Brightness Cutoff mode. Play with the Brightness Cutoff Threshold up and down arrows until you get it to look like you want it to. Make sure Remove background is checked. Then click OK to execute the trace. (You'll need to close the dialog box to continue.)
Tutorial: Use the free application Inkscape to trace and vectorize your illustration and hand lettering
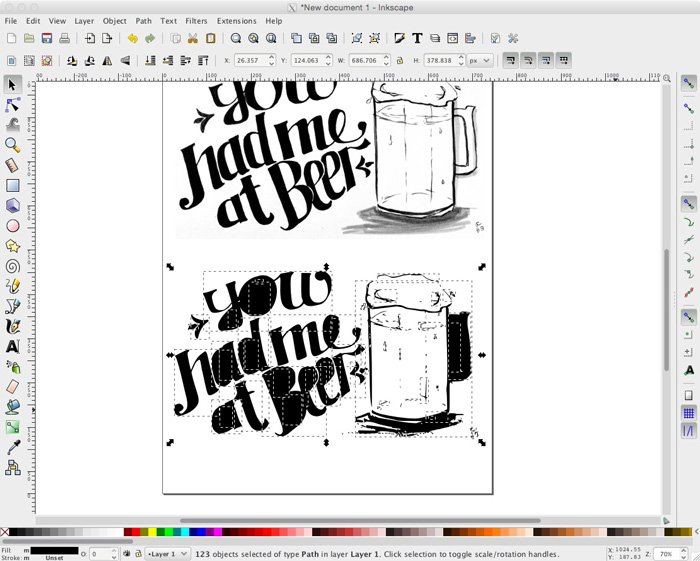
Your new trace was created on top of your original drawing. Move the new trace so you can see your result.
Tutorial: Use the free application Inkscape to trace and vectorize your illustration and hand lettering
Step 5: Edit your vectorized art
From here, if you want to separate your drawing or edit individual letters, you need to break your art apart, kind of like step 5 of this Illustrator tutorial.
In Inkscape, select your traced layer, then select Path → Break Apart. You'll notice all of your lines run together and some holes will fill in with black.
Tutorial: Use the free application Inkscape to trace and vectorize your illustration and hand lettering
Delete the parts of the art you don't want.
Then, we're going to subtract out the "holes" from the letters where applicable. To do this, click on one of the parts of the word that need to be worked on, then while holding down SHIFT, click on the surrounding word. Both need to be selected here.
Tutorial: Use the free application Inkscape to trace and vectorize your illustration and hand lettering
Now, go to Path → Difference, or hit CTRL and - (use CTRL even if you're on a Mac).
Tutorial: Use the free application Inkscape to trace and vectorize your illustration and hand lettering
Continue until all of the holes are punched out.
Tutorial: Use the free application Inkscape to trace and vectorize your illustration and hand lettering
Now, go ahead and delete your original artwork from your canvas and export the fully vectorized drawing. You can save it as its default SVG (Scalable Vector Graphic) file type, or you can go to File → Export PNG Image….
If you're going to export to PNG, I recommend selecting your art pieces, then using the settings I have below. You can adjust the image width and height to the size needed, too. It will automatically clip to the artwork and leave you with a transparent background.
Tutorial: Use the free application Inkscape to trace and vectorize your illustration and hand lettering
For fun, here's what my drawing looks like on a mug!
You had me at beer - mug
I hope this tutorial was helpful. It just goes to show you that anything is possible as long as you exercise some patience and do your research. I was very skeptical in trying out this new program. While I still will continue to use Illustrator, it's so nice to know that there's a suitable free alternative out there.
Resources: More on Inkscape tracing. Mug resource by Medialoot.


