How to make your own font using Glyphs and Illustrator
So, you're a designer or illustrator. Or you just really love typography. Or your own handwriting. Have you always wanted to create your own font? Here's how to create a hand-lettered font from start to finish using Adobe Illustrator and Glyphs.
How to create your own font using Illustrator and Glyphs app - Tutorial on HelloBrio.com
Making your own font is:
a great way to show off your design and illustration skills
a milestone for any designer
a fun way to capture your own handwriting
a necessity for branding when you want to go the extra mile
an exercise in your OCD—better known as your meticulous attention to detail
a fun way to learn more about Adobe Illustrator
a great excuse to learn a new program: Glyphs!
Creating my own font was on my bucket list. When I published my first font, it was a huge leap over a creative hurdle that I was ecstatic to accomplish. Since then I've published Sweet Pineapple and just published my third font, called Elbow Room!

Paperweight Font by Jenny Lee

Sweet Pineapple Font by Jenny Lee

Elbow Room Font by Jenny Lee
Now, I'm going to help YOU learn how to create your own font and save hours of research and speed bumps. I spent a whopping 9 hours on this first font from sketch to export, and since then it's taken me significantly less time with each new font.
Here are the tools and software I recommend for the hand lettering part of your journey, as well as the digitizing process:
Sakura Pigma Graphic 1 Pen or a similar inking marker or pen (my favorites)
Glyphs App (I used the free demo for my first font, and purchased Glyphs Mini after that)
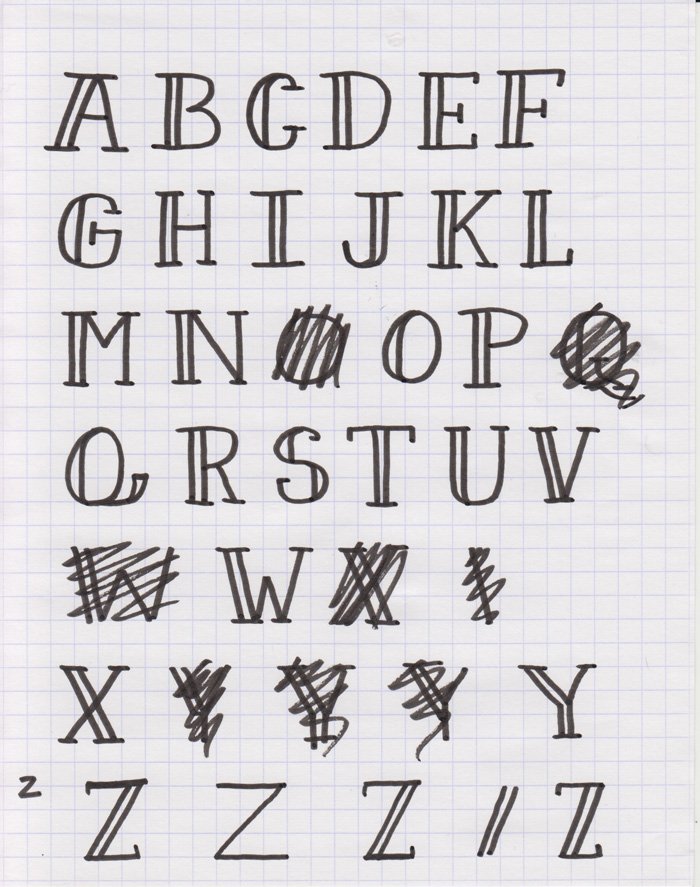
Draw each glyph of your hand-drawn font
Finding the style of your font can be the hardest place to start. When I was trying to decide, I went for my go-to doodle-y hand-lettering style.
I recommend starting with a lettering style that you already use in your own illustrations or hand lettering projects.
Sketching on graph paper is a great way to keep your letterforms organized.
For starters, it's a good rule of thumb to have 4 equal heights each for the ascender, x-height, and descender.
Draw each letter carefully and re-draw letters and characters that you aren't happy with.
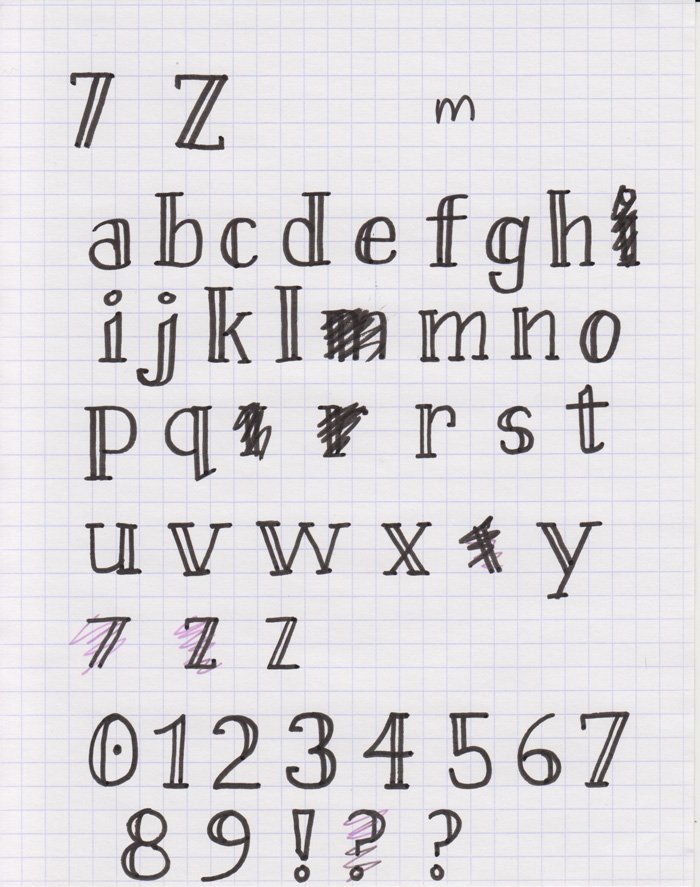

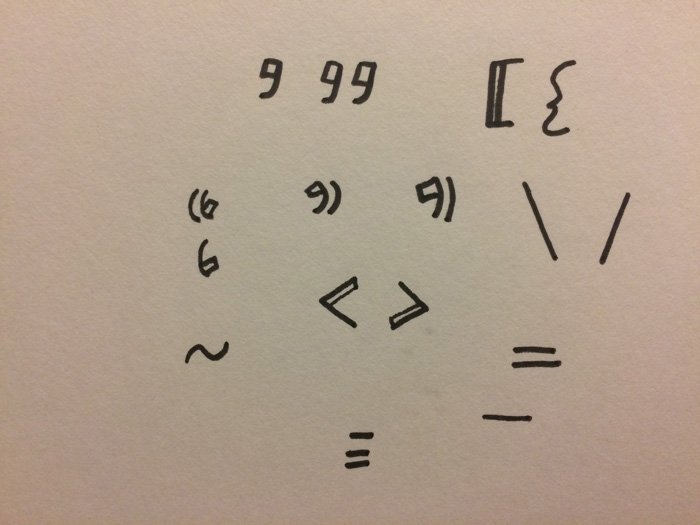
It's up to you how many symbols and other characters you want in your font. If you plan on selling your font, I recommend having a full suite of the most commonly used symbols.
Scan and vectorize your hand-drawn letters in Illustrator
After you have a letter set you're happy with, scan in your work. Sometimes even seeing it on the screen versus on the piece of paper can help you see which glyphs you need to redraw.
After you have your work scanned in, vectorize your work in Illustrator using Image Trace to get your glyphs to be individual vectors. Using Illustrator is a super fast way to digitize your drawings and watch them become computer-friendly.

Here's your chance to also clean up your work and smooth some bumpy lines with a tablet (follow these tips on how to use your Wacom tablet to smooth your work quickly). Smooth the bumpier lines but make sure to keep the original hand-drawn qualities if that's the look you're going for.

Make sure to group each letter so little pieces don't get left behind (especially those lower case i's and j's).
Set up your Illustrator file for Glyphs App to make your hand-drawn font
To make the transfer to Glyphs App easier later, it's best to set up your Illustrator file so that you can quickly copy and paste each glyph. This video was helpful.

To set up your Illustrator file:
Each letter will be no more than 100px square, so each major block will be space for one letter. Move each letter to line up with the correct grid subdivisions.
Repeat until your letters are positioned correctly.
Draw a 100x100px box around each letter (no stroke or fill value). Use the move and copy tool (CMD+SHIFT+M) and repeat tool (CMD+D) to make sure each of these boxes are precise.
Group each letter with its bounding box.
Use the align tool to move all of your letters to the top-left position (so each corner lines up at 0,0)
Select all of your items and then use Release To Layers (sequence) in the Layers window drop down.
With all of your letters selected, resize them to 1000x1000px. Now each individual letter with its bounding box is on its own layer.
Move up all of your letters and their bounding boxes up 750px (by typing -750px in the y axis field) to make it easier to copy and paste into Glyphs App in the next step.
Save and open Glyphs!

Move your hand-drawn font characters into Glyphs App
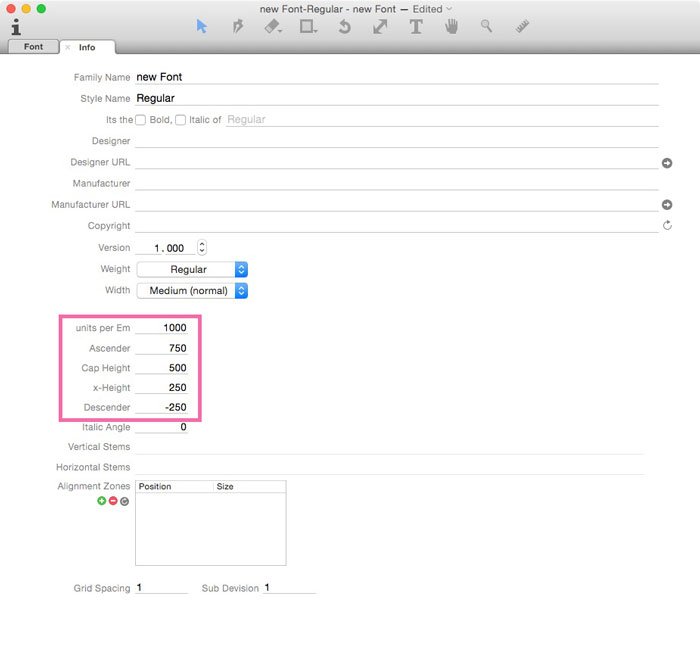
In Glyphs, set up your file (File → Font Info) so it matches your original font design as follows:
Units per Em: 1000
Ascender: 750
Cap height: 500
x-Height: 250
Descender: -250
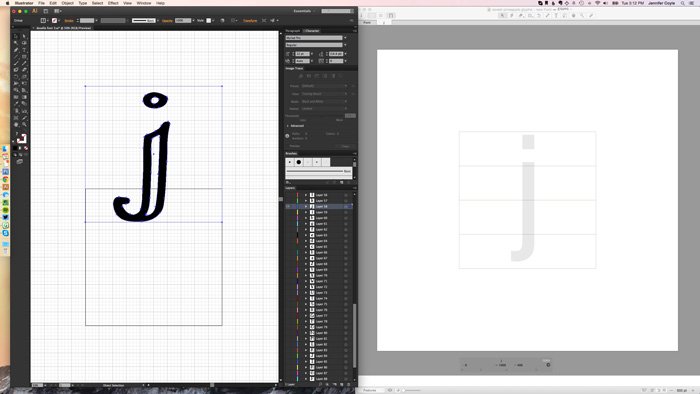
Add all of the numbers, symbols, and other pieces you want into your collection. When you're ready, start adding characters individually by double-clicking the character in Glyphs and pasting the character in from Illustrator.
After you paste from Illustrator, double click on the bounding box in Glyphs and delete the bounding box.

Open and close each letter and symbol until you've copied and pasted each glyph from Illustrator.
When you're done, highlight all of your glyphs in the app (CMD+A) and change the LSB and RSB (left and right side bearing) in the bottom-left settings.
Set your font’s kerning within Glyphs App
Kerning. It's the part of the font design process where you specify the distance between specific letter pairs.
It's what makes your font have the extra polish that other fonts may not have, and really becomes the pivotal point for attention-to-detail that goes into designing your own font.
In the first version of this tutorial, I talked about exporting and testing your font over and over again to work on kerning. Turns out that was wrong AND a huge time waster, and that is not what I'm about at. all.
In order to do this, double-click on a letter and then type in various words to test them. You can also hit CMD+OPTION+F for built-in testing pairs.
You can see how awkward the spacing was for these letters before I kerned them.
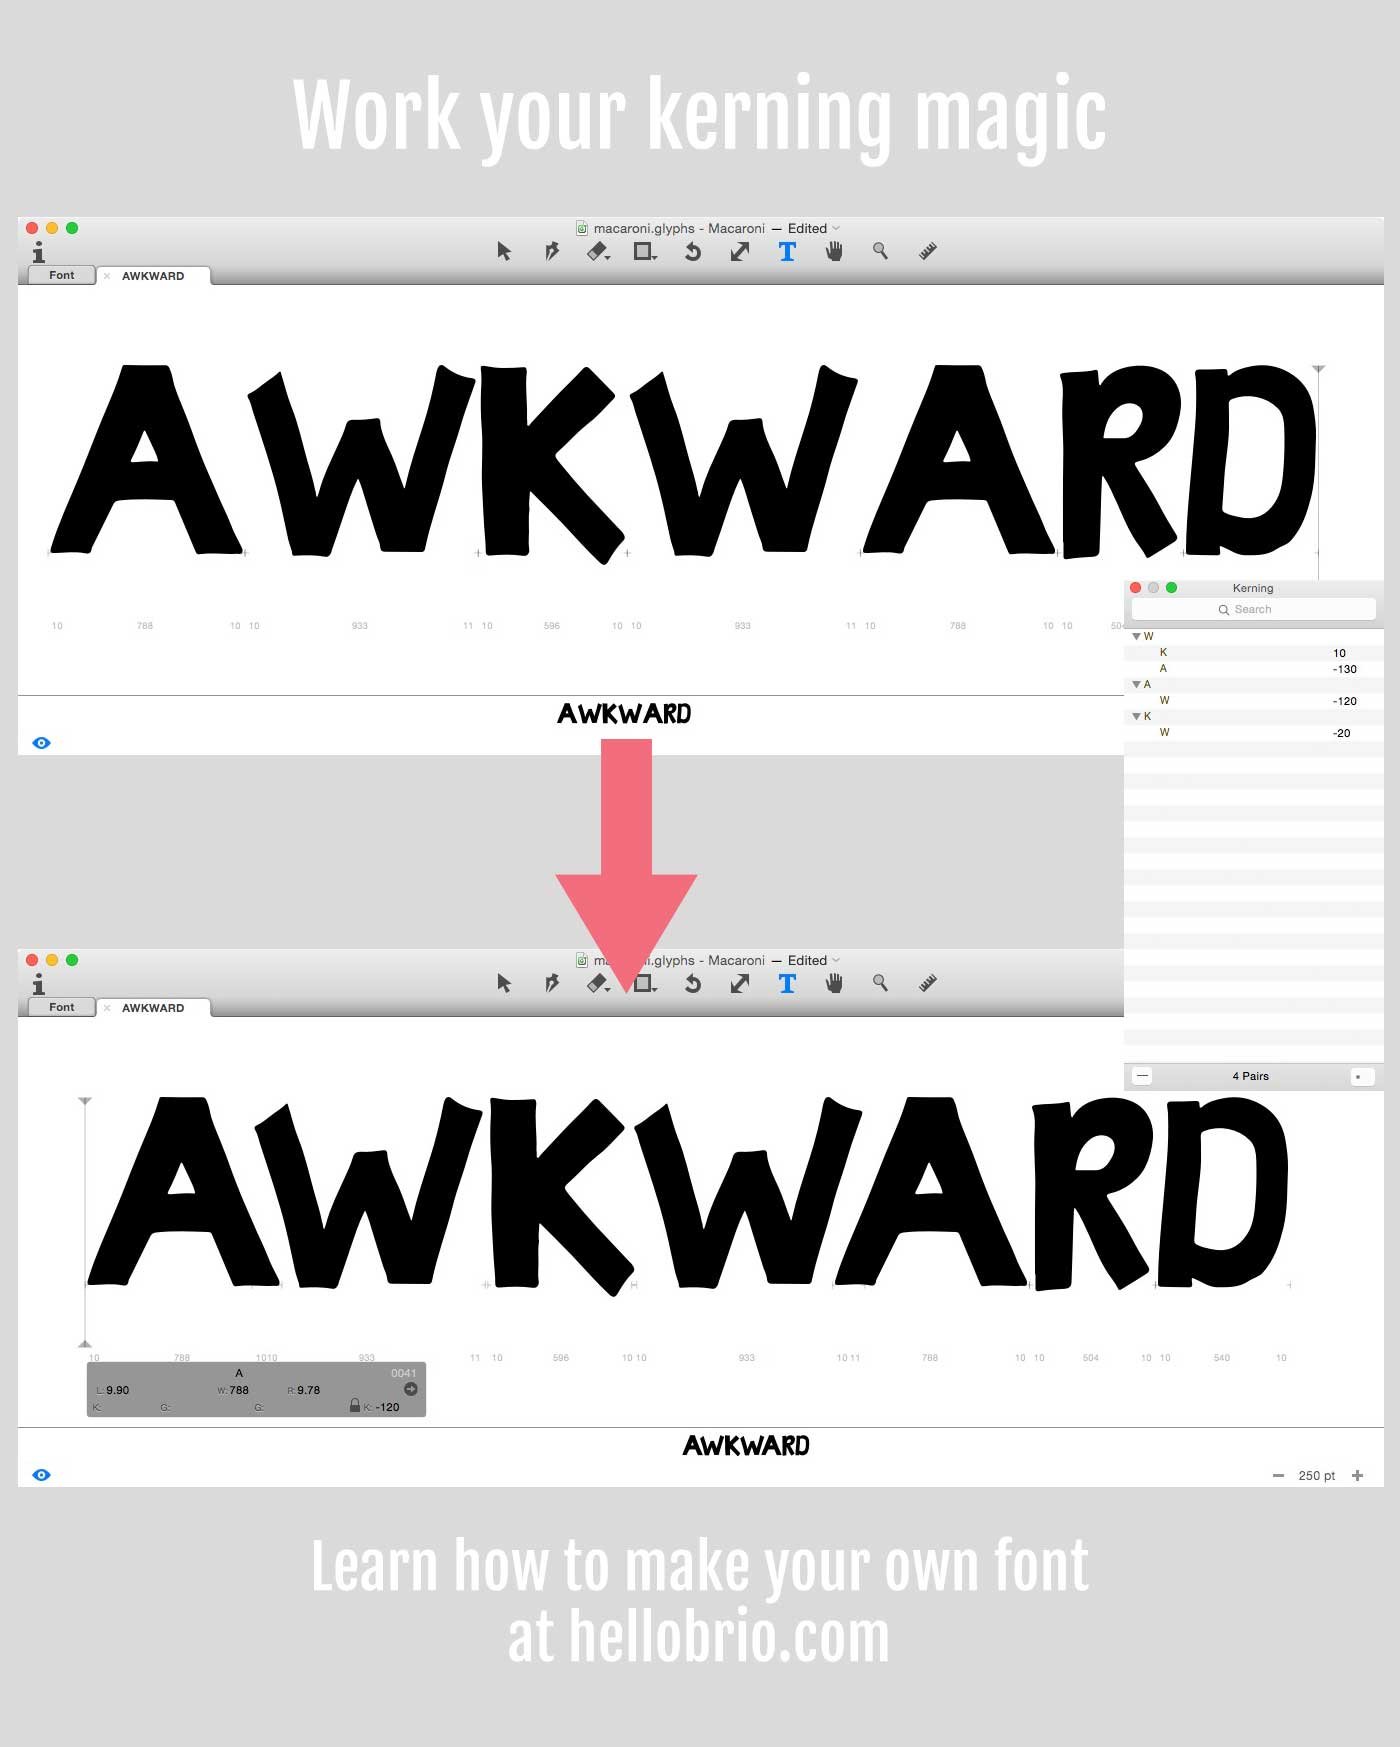
To kern, click between each letter and use CMD+OPTION Left/Right on a Mac or CTRL+ALT Left/Right on a PC. Hold down SHIFT for increments of 10. Learn more tips here.
After a lot of tweaking, you'll have a list of kerning specifications in your Kerning Panel.
Export and test your hand-drawn font
Now that your font is beautifully kerned, you can export it and test it for real.
Install it like you would any other font and play around with it in Photoshop and Word or similar applications. Take note of any letters that need to be moved or if one set of characters needs to be kerned differently.
Congratulations, you made your very own hand-drawn font!
By this point, you may have your own font by using Illustrator and Glyphs! Things can only get better from here.
Do you want to make your own font, but you feel stuck? I highly recommend just diving in. Get the first one "out of the way", per se, which can help you learn the workflow as well as learn things for future font design.
If you want to watch a video course on how to create your own hand-drawn font, come check out my course on Skillshare!
I hope this tutorial on how to create a hand-lettered font was helpful. Ask any questions in the comments below!
Cover photo by Bram Naus